Robot Frameworkで始めるテスト自動化(導入編)
はじめに
Robot FrameWorkはPython製の自動テストを実現するフレームワークです。
https://robotframework.org/
自動テストのツールは結構ありますが、これはpythonさえあれば構築できるところが良いですね。
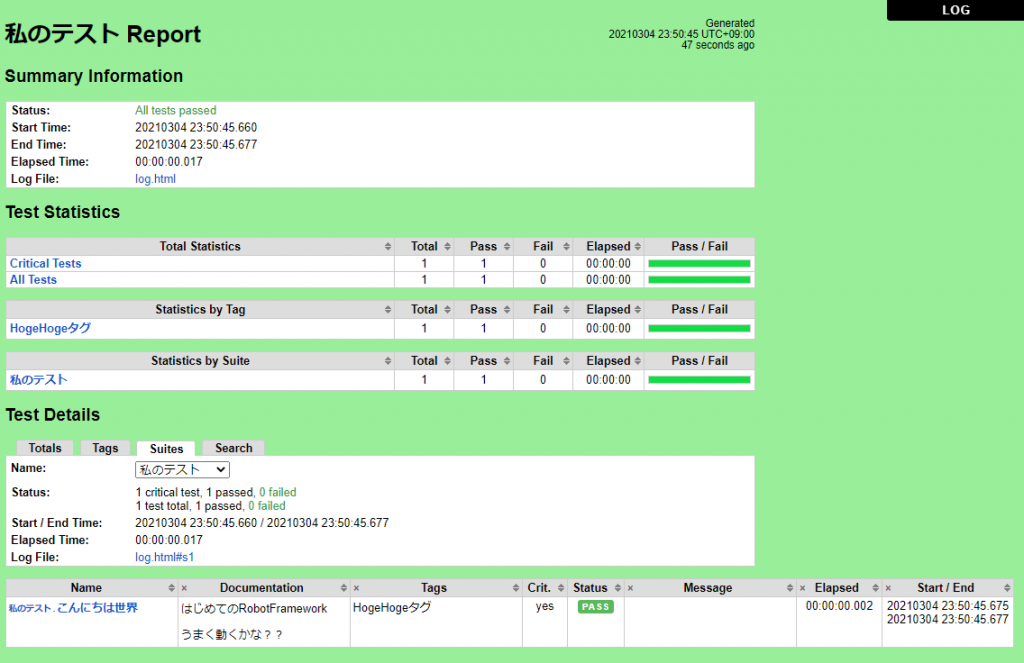
下記はQuickStartGuideにあるサンプルを実行して出力したレポートです。
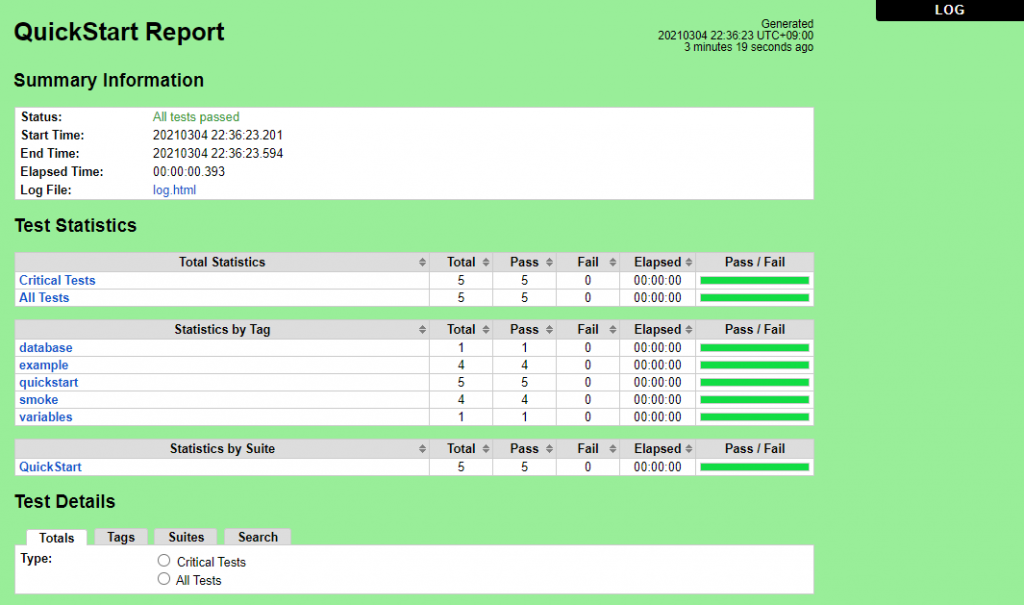
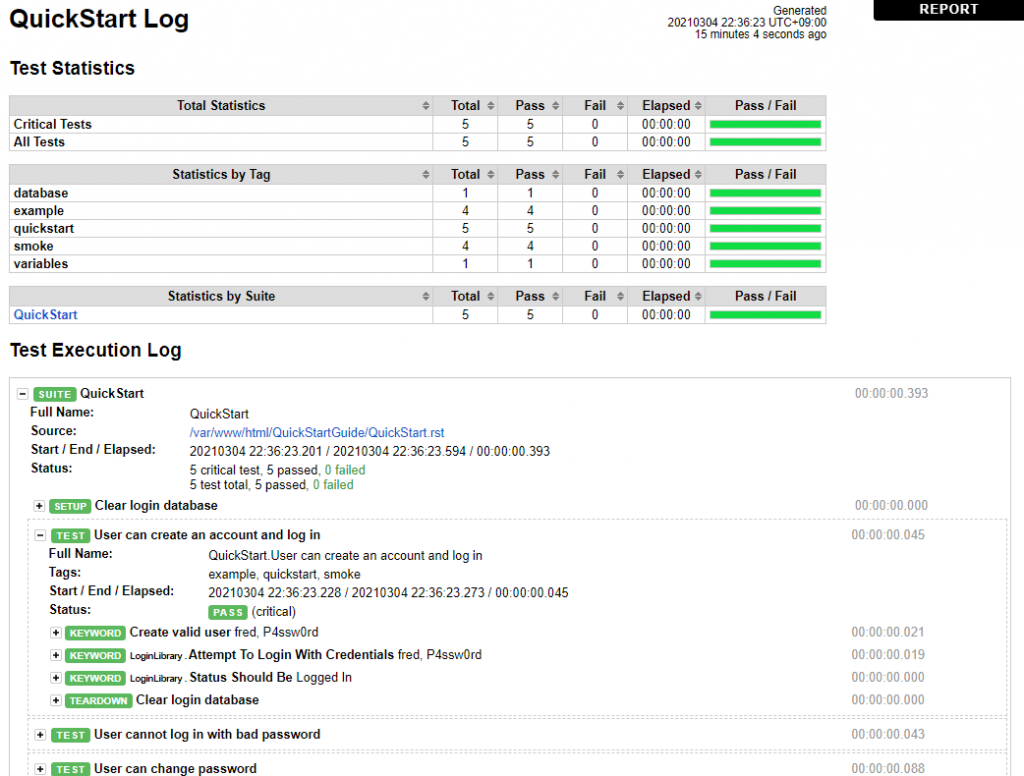
レポート自体は簡素な見た目ですが、その分軽量なので個人的には好きです。
テスト項目、実行結果、失敗時のログが分かれば十分ですからね。
グーグルで検索すると、Seleniumと組み合わせてブラウザを操作しWEBアプリをテストする例がよく出てきます。
ですが、別にWEBアプリに限らず、Pythonで出来る操作はすべてRobot Frameworkによってテストすることができます。
例えば、netmikoと組み合わせてネットワーク機器を操作するようなテストもOKです。
本ページでは、Python 3.8.5とRobot Framework 3.2.2 を使った実行例を掲載しています。
インストール
RobotFrameworkは下記でインストールします。
pip3 install robotframeworkQuick Start Guideを実行する場合は、reStructuredText形式のファイルを扱うため docutils をインストールします。
pip3 install docutilsインストールが出来たらQuick Start Guideを実行してみましょう。
https://github.com/robotframework/QuickStartGuide
 $ git clone https://github.com/robotframework/QuickStartGuide.git
 $ cd QuickStartGuide
 $ robot QuickStart.rst
最小のテストケース
動作確認が出来たら最小のテストケースを作ってみましょう。
まずは単純なHello Worldをやってみます。
mytest.robot
$ cat mytest.robot
*** Settings ***
Library           MyLib.py

*** Test Cases ***
Hello World
    Print Message To Console      "hello world"
MyLib.py
$ cat MyLib.py

class MyLib(object):

    def __init__(self):
        None

    def print_message_to_console(self, message):
        print(message)
ポイントとしては、Libraryで指定したpythonファイル名とClass名が同じであること、メソッド名がTest Casesに記載した宣言と関連します。
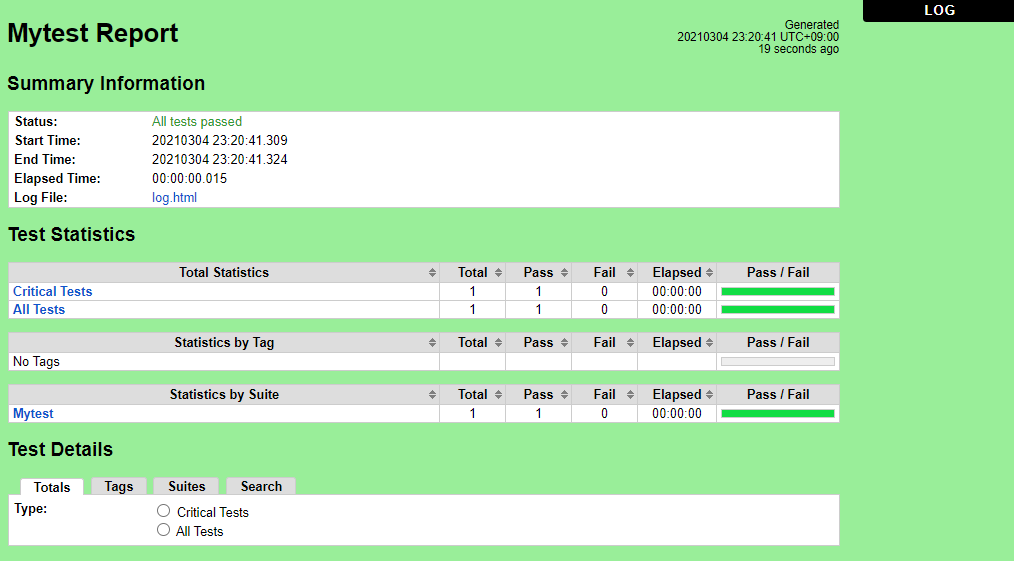
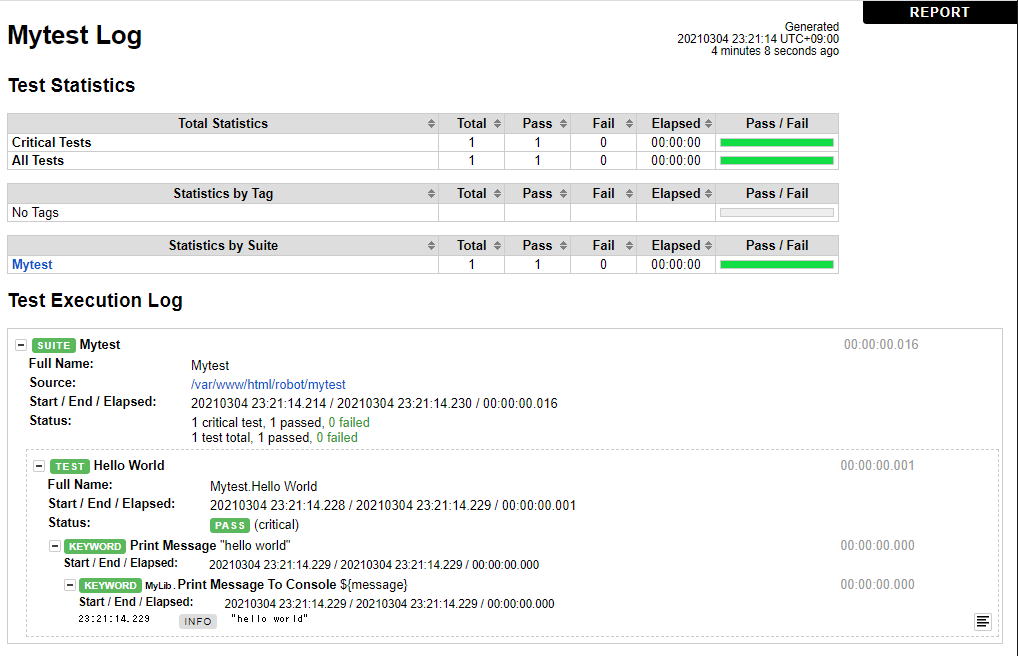
ファイルを用意したら、robotコマンドでテストを実行します。
$ ls
$ MyLib.py mytest.robot
$ robot mytest.robot
$ robot mytest
==============================================================================
Mytest
==============================================================================
Hello World | PASS |
------------------------------------------------------------------------------
Mytest | PASS |
1 critical test, 1 passed, 0 failed
1 test total, 1 passed, 0 failed
==============================================================================
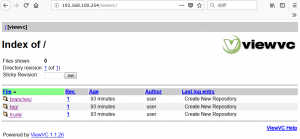
Output: /var/www/html/robot/output.xml
Log: /var/www/html/robot/log.html
Report: /var/www/html/robot/report.html
$ ls
log.html MyLib.py mytest.robot output.xml __pycache__ report.htmllog.html, report.html, output.xmlが生成物です。
ブラウザから見てみましょう。
日本語でもいける
先ほどのテストでは全部英語でしたが、日本語も扱うことができます(UTF-8のみ)。
$ cat MyLib2.py
class MyLib2(object):
def __init__(self):
None
def メッセージをコンソールに出力する(self, message):
print(message)
$ cat 私のテスト.robot
*** Settings ***
Library MyLib2.py
*** Test Cases ***
こんにちは世界
[Documentation] はじめてのRobotFramework
...
... うまく動くかな??
[Tags] HogeHogeタグ
メッセージをコンソールに出力する "こんにちは 世界!"
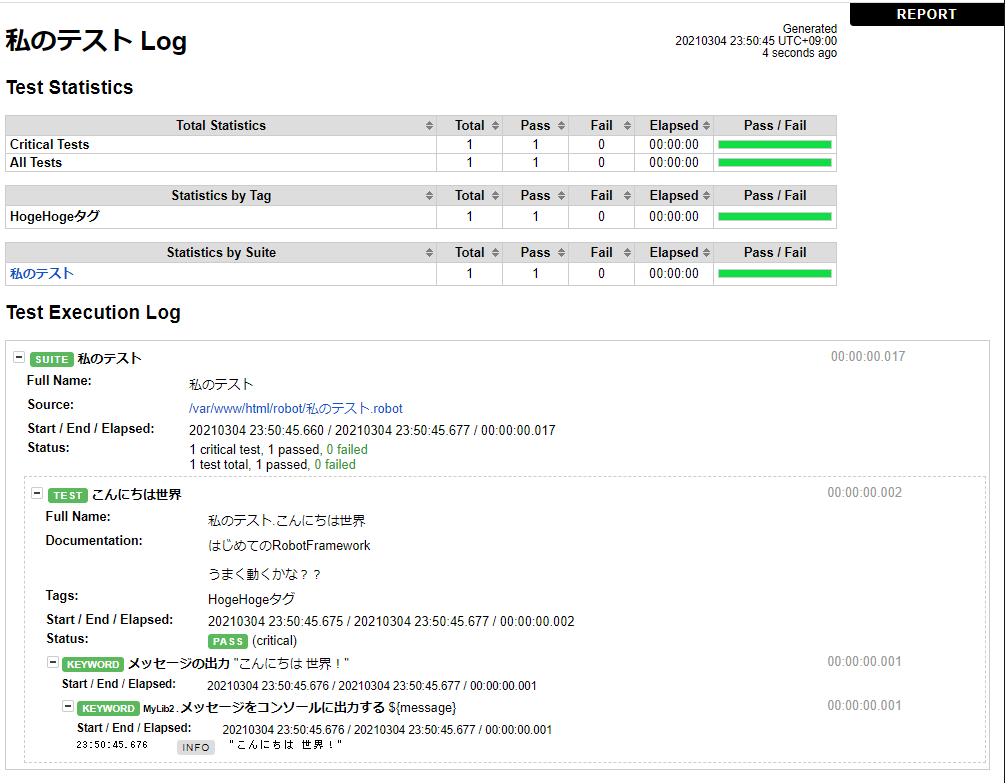
$ robot 私のテスト.robot下記のような結果になります。
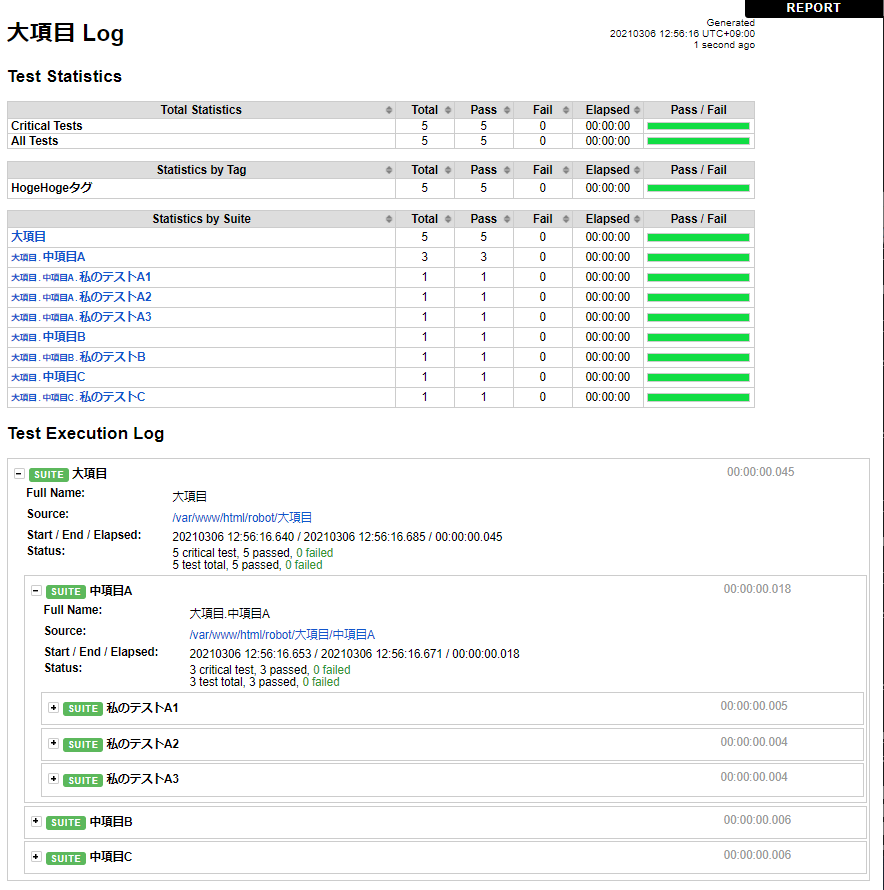
ディレクトリで階層を分けることも
下記のようなディレクトリ階層にすると、テスト結果をディレクトリとテストを定義したファイルごとにグループ化してくれます。
$ find 大項目/
大項目/
大項目/中項目B
大項目/中項目B/私のテストB.robot
大項目/中項目C
大項目/中項目C/私のテストC.robot
大項目/中項目A
大項目/中項目A/私のテストA2.robot
大項目/中項目A/私のテストA1.robot
大項目/中項目A/私のテストA3.robot
$ robot 大項目
まとめ
今回は導入と簡単なテストケースの作成と実行を試してみました。
この例では必ずPASSするテストケースしかないので、次回はFailのケースや詳細な使い方について書きたいと思います。
参考リンク
https://github.com/robotframework/QuickStartGuide/blob/master/QuickStart.rst
https://robotframework-ja.readthedocs.io/ja/latest/quickstart/QuickStart.html


コメント